Part 2 Download R, then RStudio
2.1 How and from where
You can view videos on how to download R and RStudio here: http://go.hawaii.edu/wKf . On that web page, go to the Set Up panel on the left side of the web page to see the videos. The URLs that the video mentions are here: https://cloud.r-project.org/ for downloading R and here, https://www.rstudio.com/products/rstudio/download/ for downloading RStudio.
When you download RStudio, the free open-source license version is all you need. This is labeled as “RStudio Desktop” and is for laptops and desktops.
2.2 Look at RStudio’s environment
Once you have downloaded R and RStudio, you can work in RStudio and forget about the actual R application (until you update it in a few months).
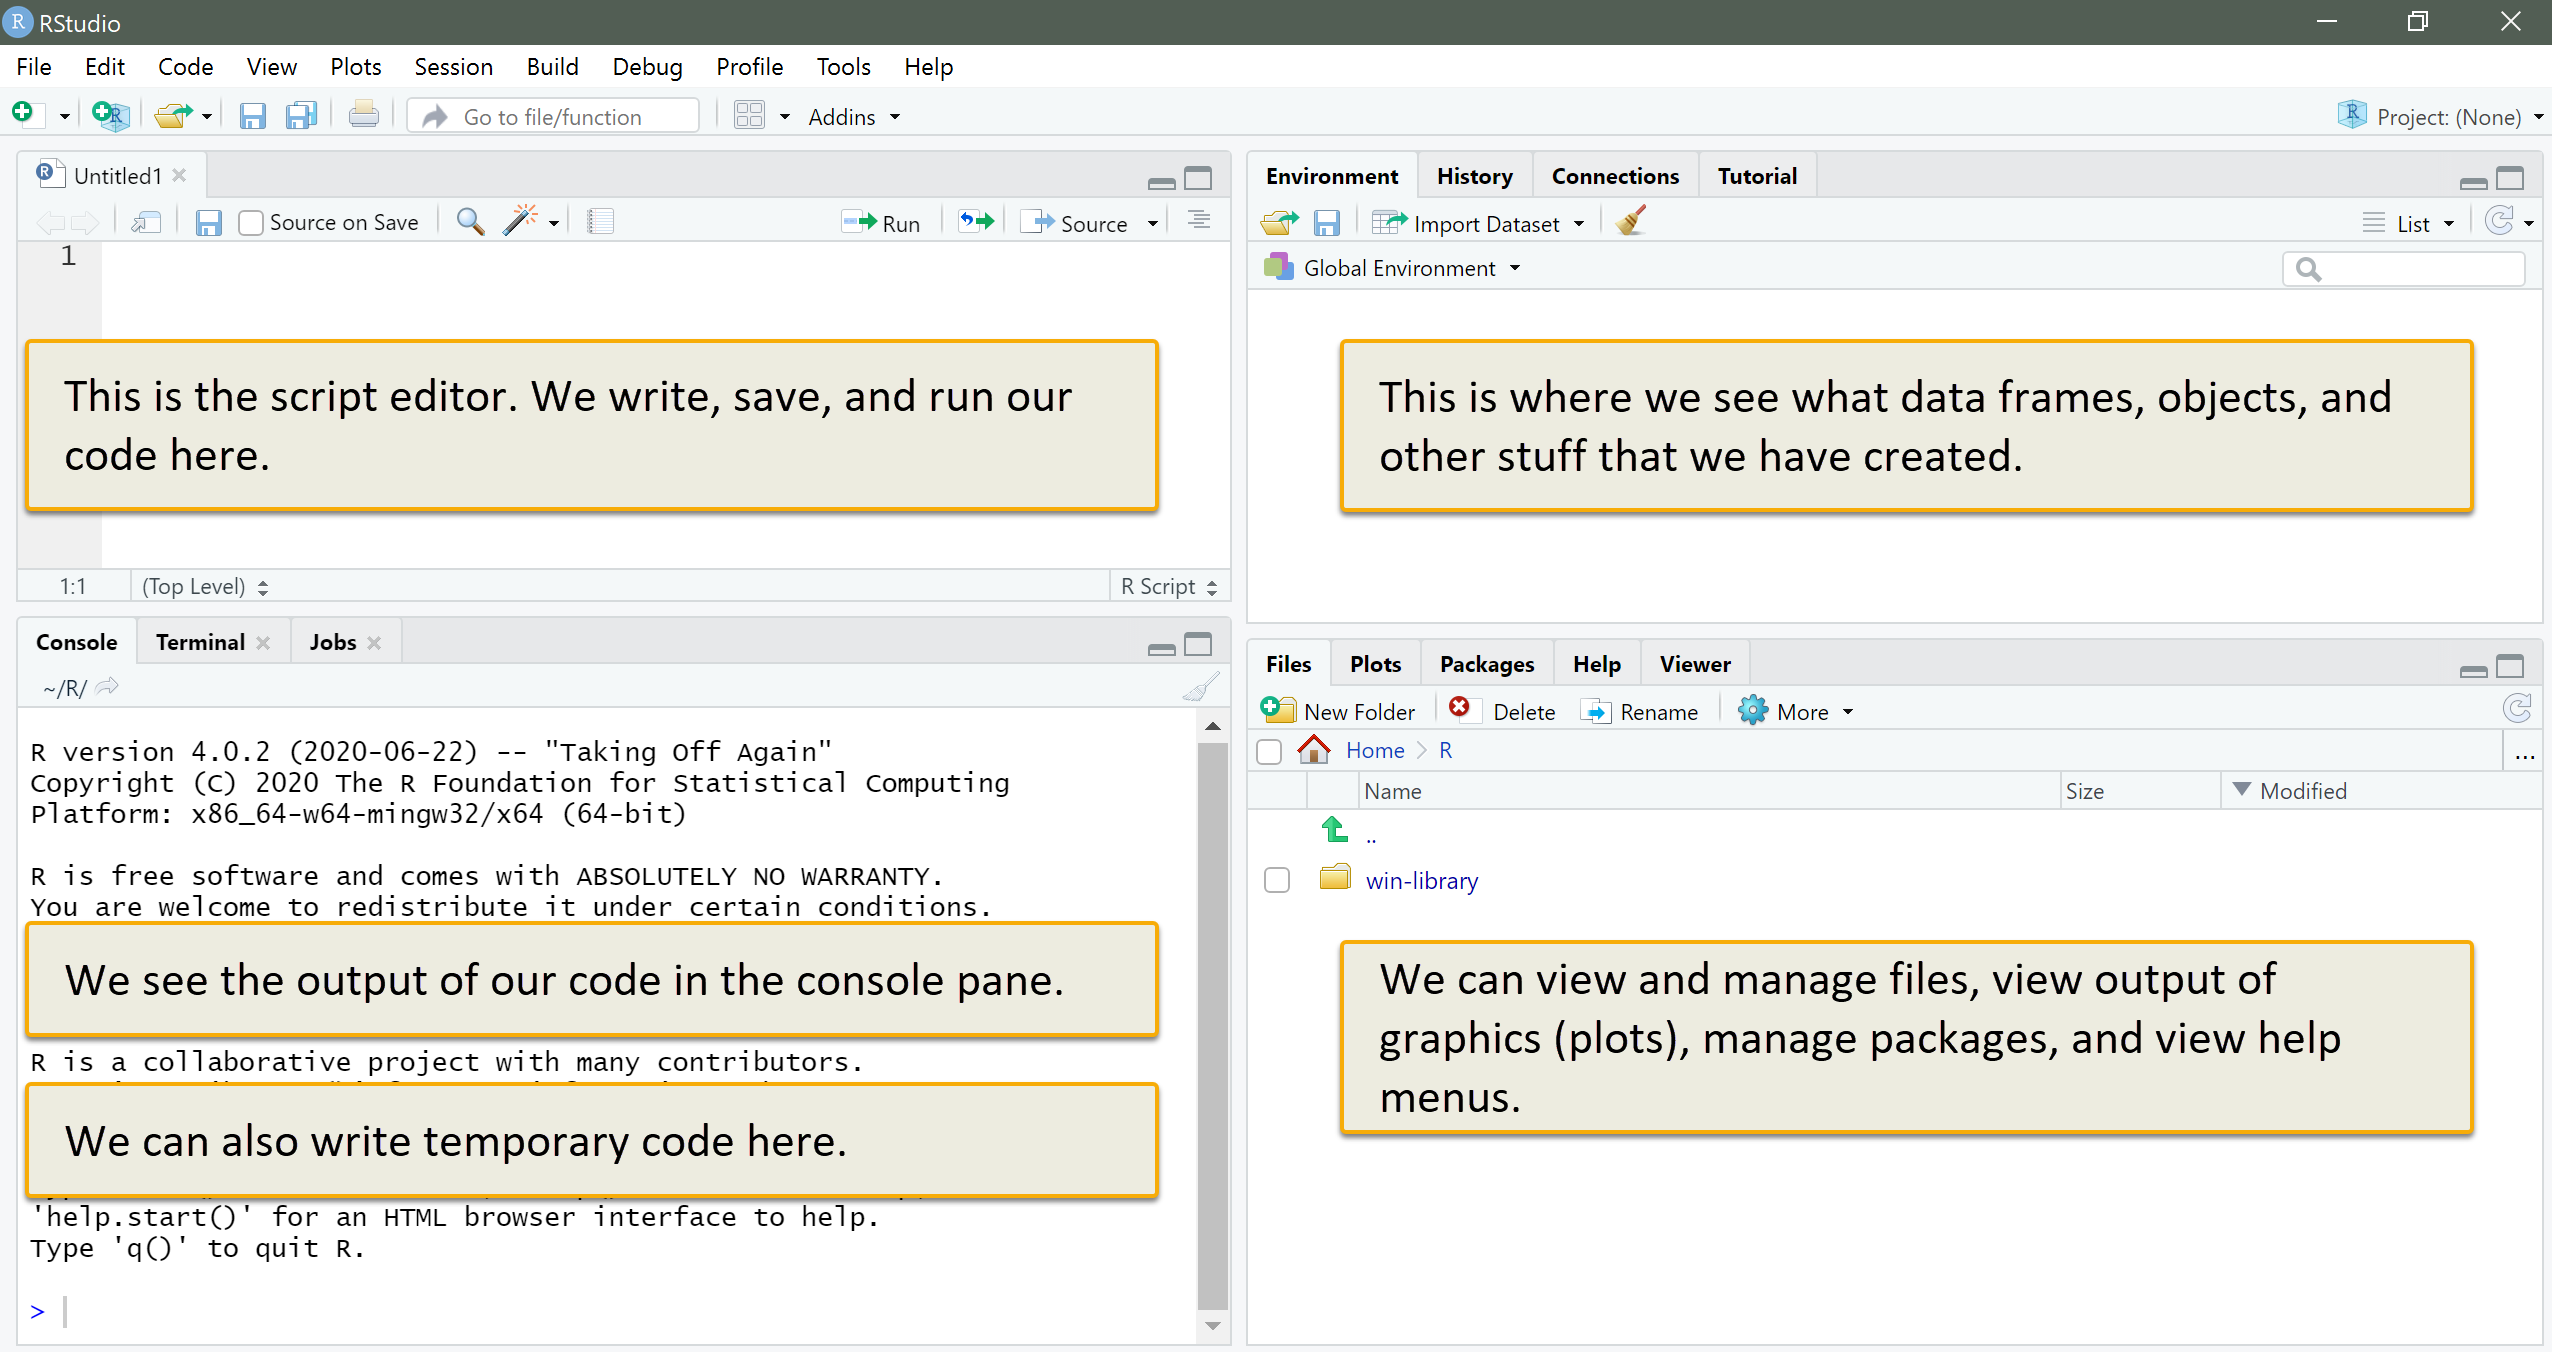
For now, to see what it looks like, open RStudio in the same way you’d open other new programs on your machine (such as through the Start menu on a PC).1 You’ll see four panes.

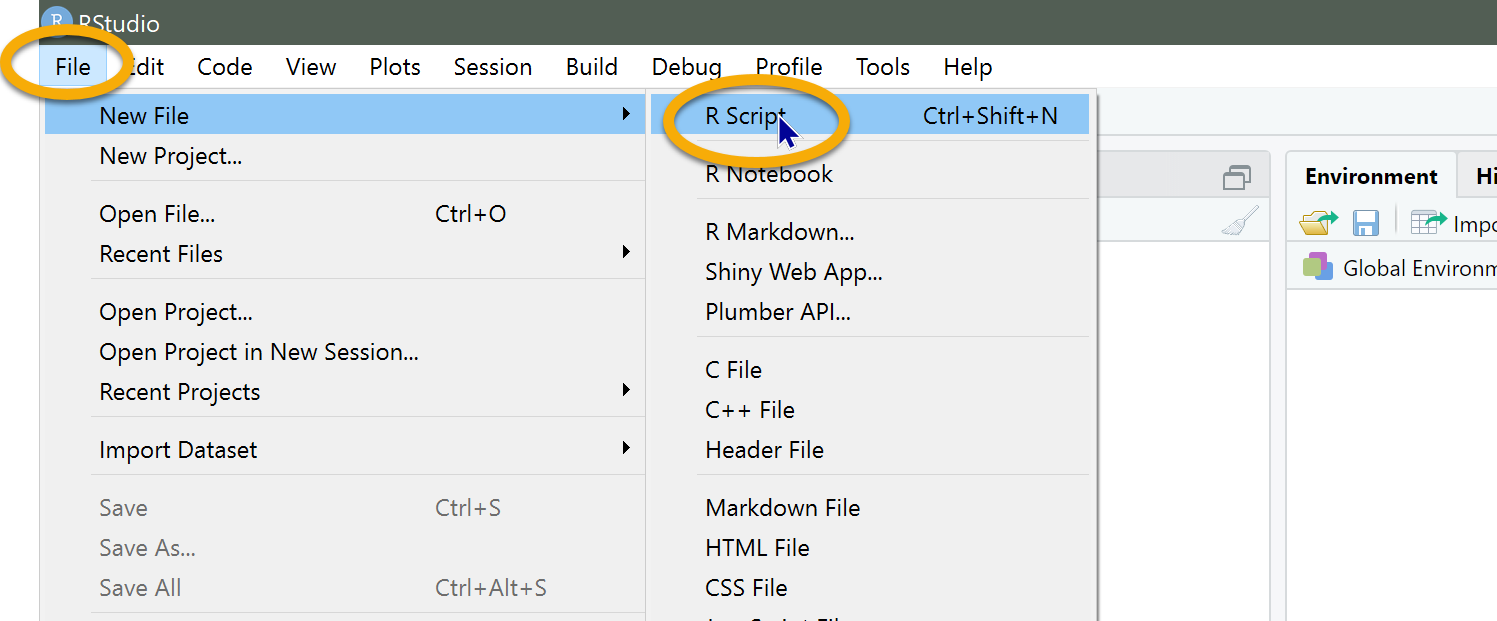
If you don’t see the script editor pane, you can create a new script.

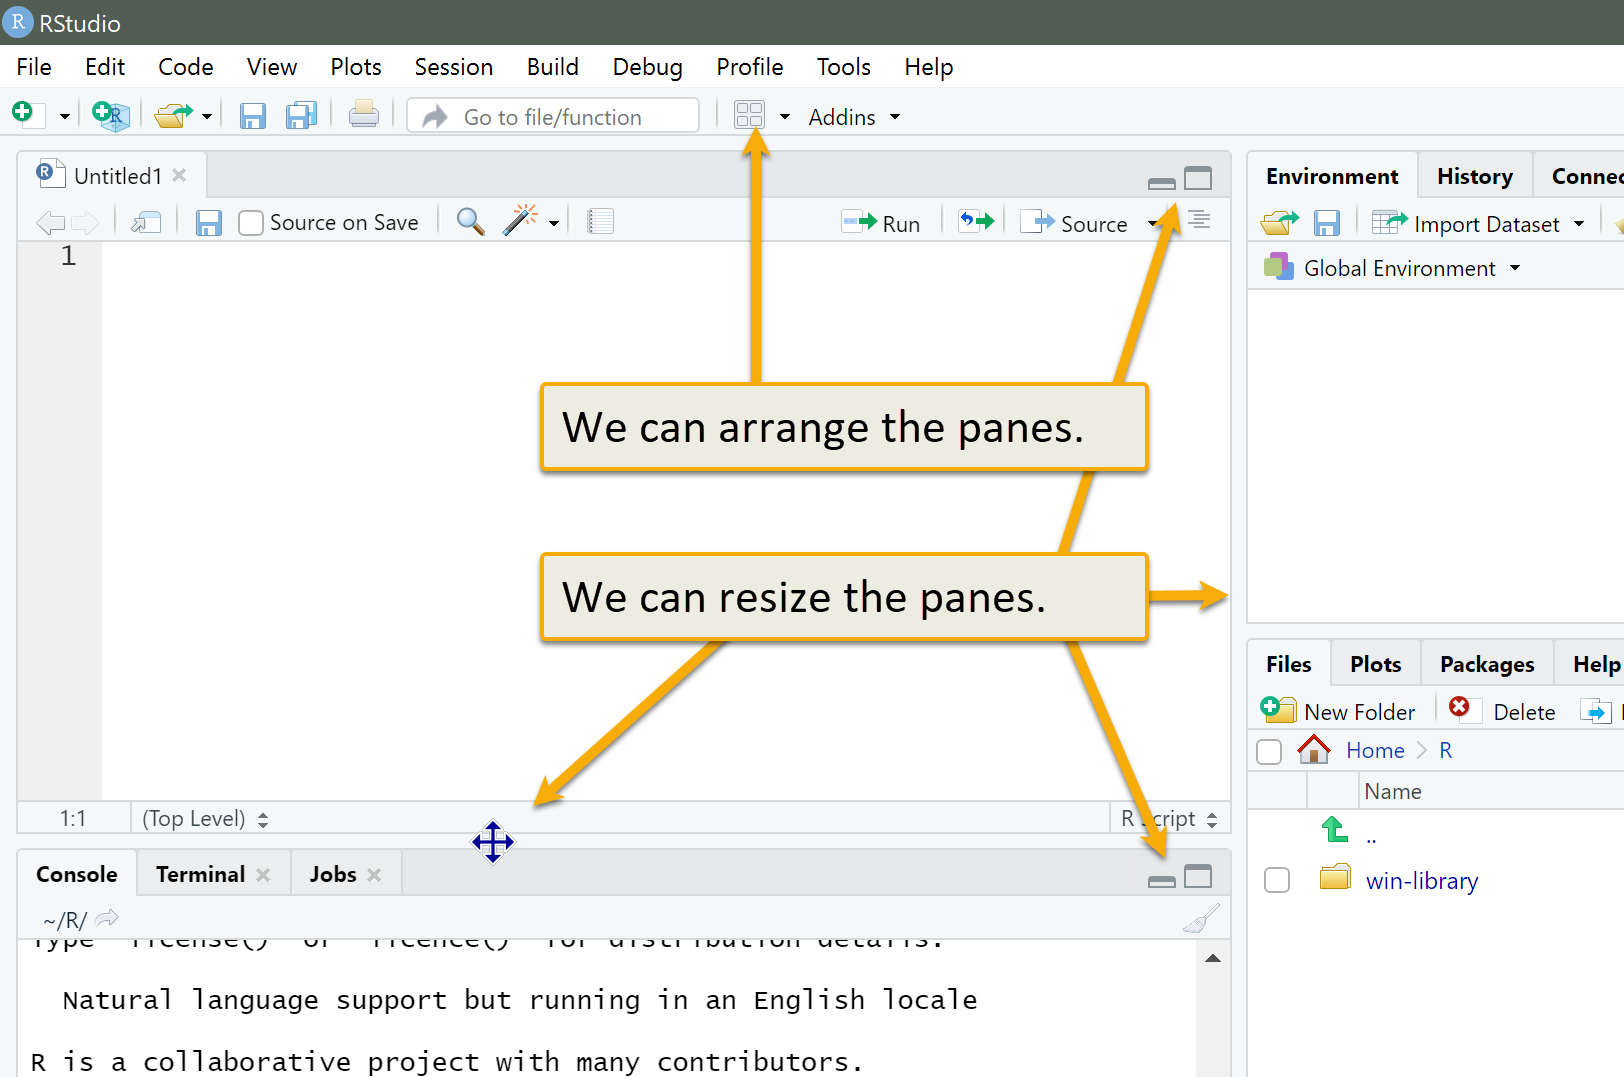
You can rearrange the panes, change the size of each, and click on the tabs within each pane to view the contents.

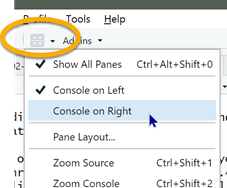
The icon with four boxes within it is for rearranging panes. Sometimes, we might want to have the console (the output) on the right):

In your usual workflow, you can open RStudio by clicking on an R file in a local directory on your machine, such as from within a folder you have created for a lesson in our class. We’ll do this next.↩︎